SEO Friendly Images
A few days ago I posted about SEO Friendly Posts, today I’m going to talk about SEO Friendly Images.
BlogSpot.com users can benefit from these examples since the code is the same, however this was written for those using a real blog – self-hosted with the WordPress Program.
Again, please remember that this was written specifically for my Blogging Minions as part of the Blogger Apprentice Project (Now Called the Blogger Minion Project). But if you are new to blogging, these are the basics on how to get your site seen and indexed and follow and so on.
If you haven’t done so, please review yesterdays post. This post is a continuation and picks up as my next breath.
…….. When you add an image to a post make sure the keyword in the ALT area.
When uploading an image, go to “Link to” and at the drop down click None. Then insert into post. We do not want the images clickable, unless they are going to lead to another post.
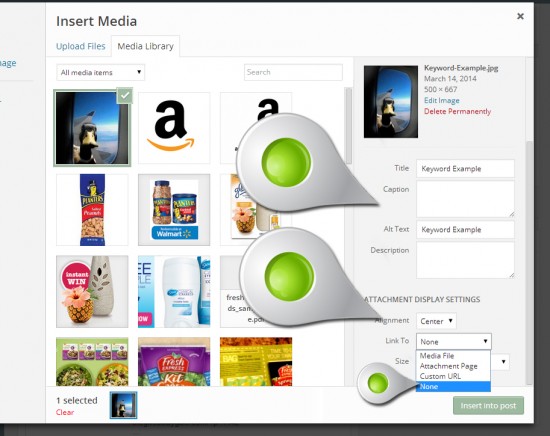
If you forget to click ‘None’, then you need to switch to the Text editor and remove the code that makes the image clickable.
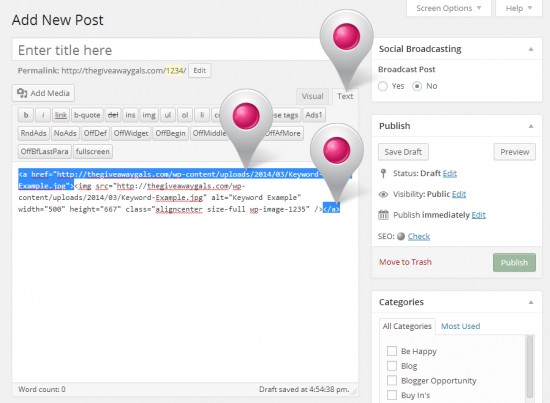
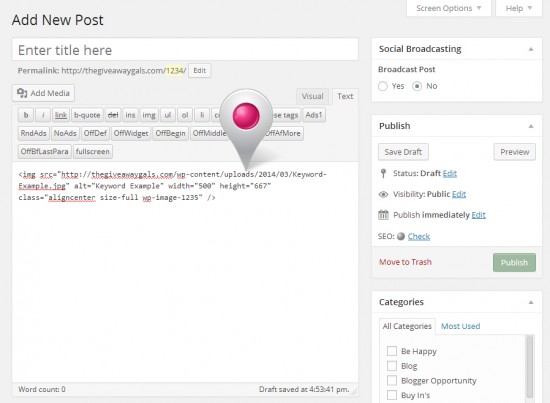
Once you remove the code that makes the image clickable, which is called an “href”, the image code will look like this in the Text Editor.
All of the links in the Blogger Minion Project training websites need to be ‘anchor links’ and open in a new tab in the visitors browser. Rarely will you add a link to a link. With very few exceptions you will always add a link to words.
Do NOT link the words Click Here – EVER!
In the Visual editor, highlight the text you want to use as a link.
Click the Link Icon
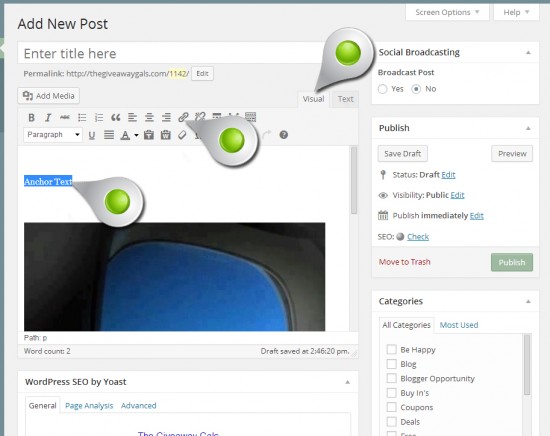
Enter the link where it reads URL then click the little box that reads ‘Open in new window/tab’.
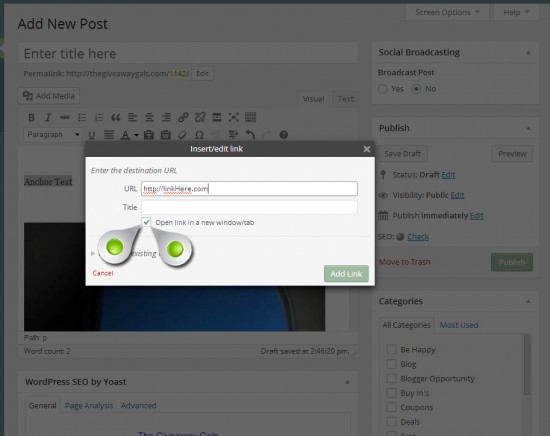
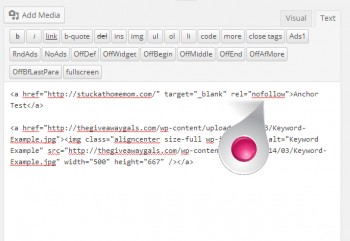
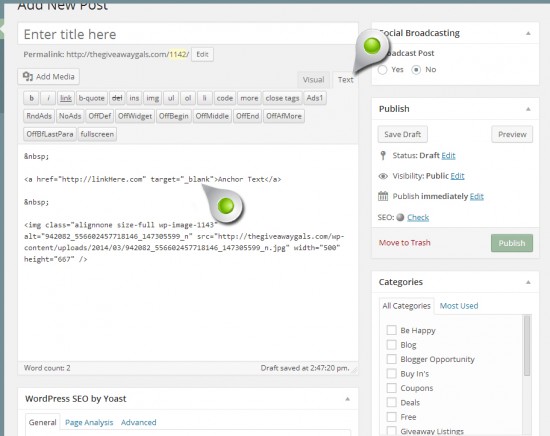
If you forget to click ‘Open in new window/tab’ you will need to go into the Text editor and enter the code into the link. The code is target=”_blank”
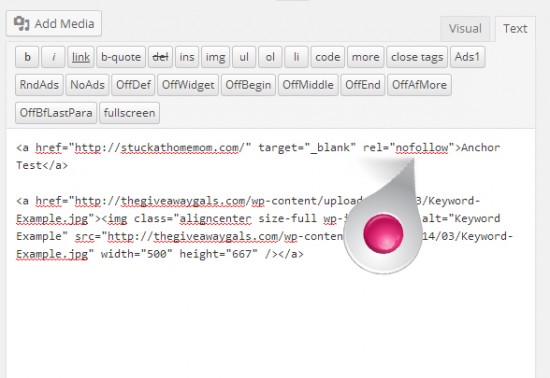
If this is a sponsored post then you need to make sure that the link is no follow or we will lose our PR Rank. After target=”_blank” you will put rel=”nofollow” before the >
All the code must go between the arrows >< if not, than the code will show on the page.
This has been an introduction to coding – now go take a nap!
