There are 2 kinds of WordPress Websites.
1) WordPress.com – The FREE hosting site.
2) WordPress.ORG – Which is the program you download if you are going to provide your own hosting.
This tutorial is for the FREE hosted site WordPress.com
(For the record, I am not a fan of WordPress.com, I prefer to use .ORG and provide my own hosting, but that’s me.)
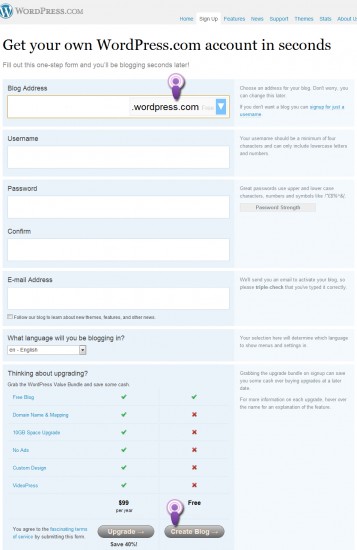
You will need to start at https://en.wordpress.com/signup/
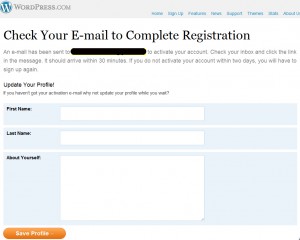
There is no point in fighting with step 2 (See image below) because no matter what you do it won’t save.
Go to your email and click the link that activates your blog and just forget about the Name and About window.
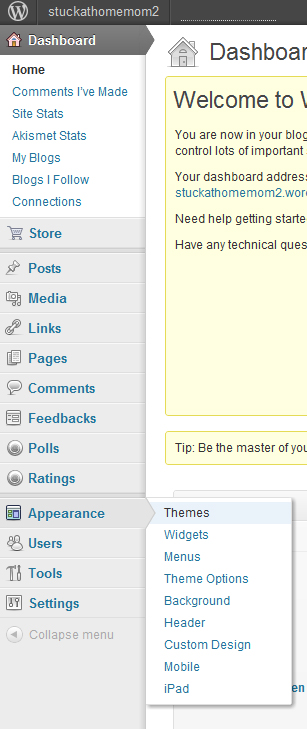
Now that you’ve activated your account, you need to dress it up.
Hover over Appearance and click Themes
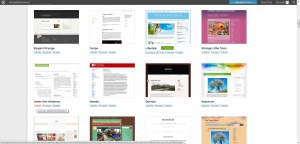
You’ll see many themes to choose from, stick with the Free Themes.
Ok, now you have a theme! But there is A LOT missing from your website – mostly CONTENT.
And if you don’t know it by now, Content is King!
At this point people are usually ready to start typing, but they’re not sure if the content should go into a Page or a Post.
Posts are used to put content in categories.
An example would be if your topic is on child development you could categorize your topics by age.
Pages are used for contact information, directions, a page about the author, information you wouldn’t normally add to.
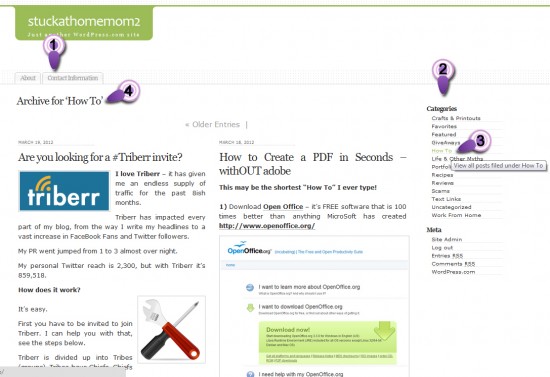
(See image below)
1) Pages
2) Categories
3) A chosen category
4) The posts within that category
1) As you can see I have limited pages. There is an About Me page that gives a short description of ME.
There is also a Page created for Contact Information. They are not articles, just important information if you need to find me or would like to know how highly I regard myself.
2) As you can see in the image above I have several posts on “How To” (3).
Each time I write an article on how to do something I put it into the category of “How To”
If you visit my blog and want to know how to do something, you’ll click the “How To” category (4) to find a list of articles on that subject.

