Please remember that I learn to crochet when I was around 6 years old from a little old lady in our neighborhood who didn’t read the crochet language – she looked at the patterns and just recreated it. For years and years I did the same until I figured out what all the stitches were called. If you get stuck there is a good chance that I wrote it wrong. Just leave a comment or drop me an email under ‘Contact us’. This is why I take a lot of pictures as I go. Most people figure it out by the images and drop me a line correcting my crochet grammar lol
Also note that I crochet right handed the directions and images are written for right hand crocheting, Sorry.
You Will Need:
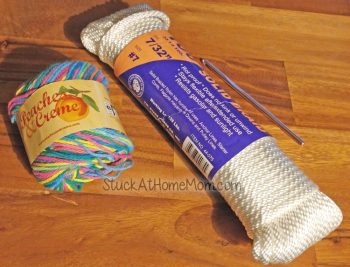
2 skeins of Peaches & Creme yarn. The kind you use for dishrags.
100 yards of 7/32 inch rope
U.S. H or 8 (5mm) crochet hook
SC = single crochet
ch = chain
x = do that as many times as the number following (x7 = do that 7 times)
SC ch1 x7 around the rope
Cornering
ch 2, 1 SC, ch 2, 1 SC
End Cornering
6 SC both sides of the rope, 1 SC on just that side of the rope

Cornering
ch 2, 1 SC, ch 2, 1 SC
End Cornering
7 SC in between next 7 SC’s
Cornering
4 SC in each of the 2 ch spaces.
End Cornering
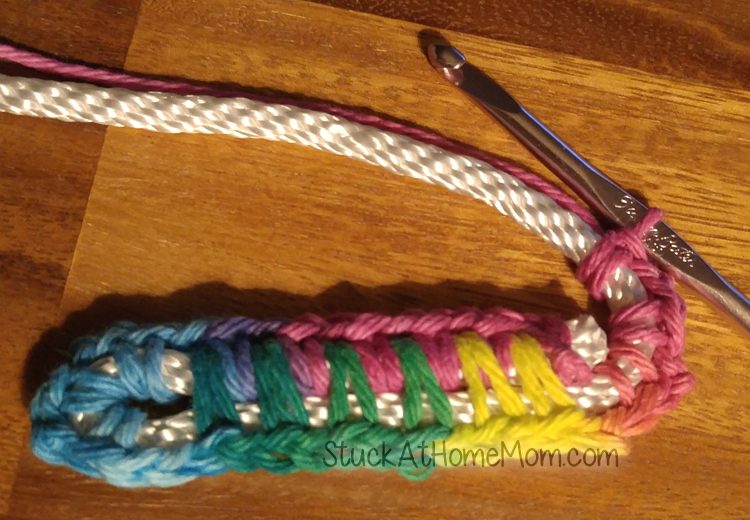
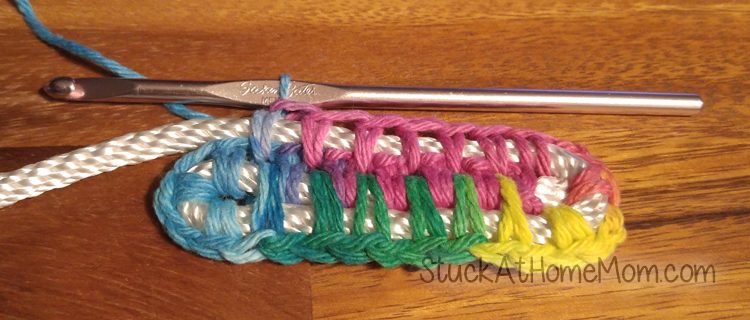
7 SC in between next 7 SC’s
Cornering
4 SC in the 2 ch spaces x2
End Cornering
8 SC ( Including 1 of this SC in the First 4 SC Corner )
Cornering
4 SC in second of the previous 4 SC Corner.
1 SC in next 3 SC.
4 SC in second of the previous 4 SC Corner.
End Cornering
10 SC between next 10 SC.
Cornering
4 SC in same space, 3 SC in next 3 spaces, 4 SC in same space
End Cornering
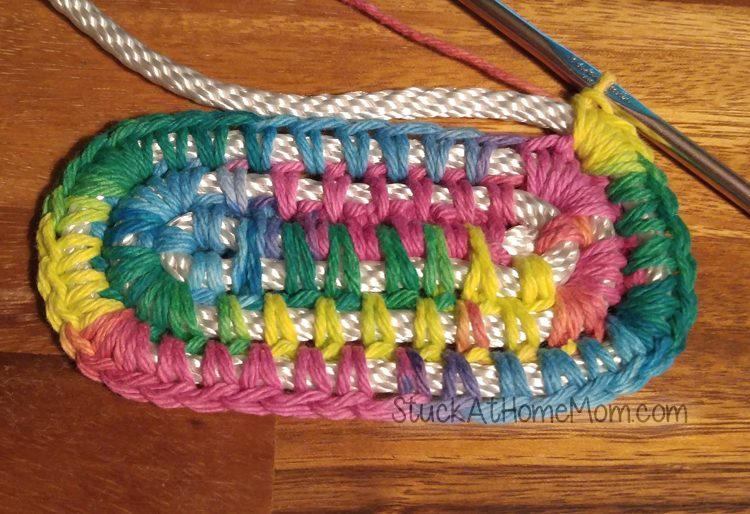
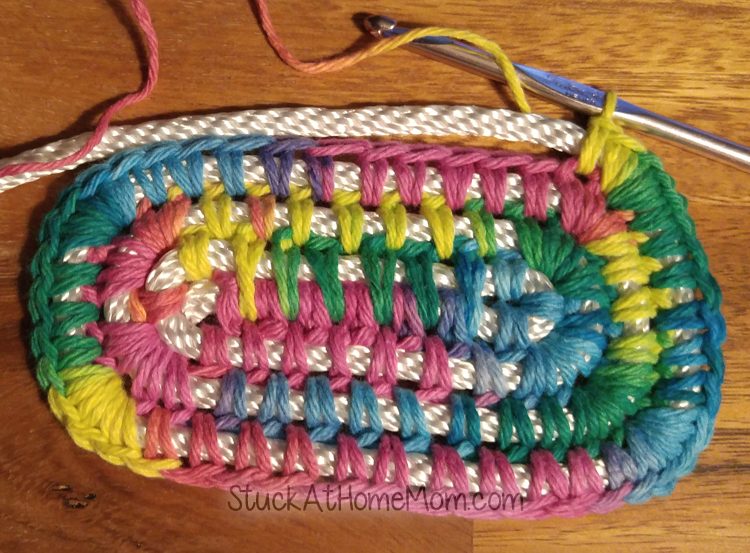
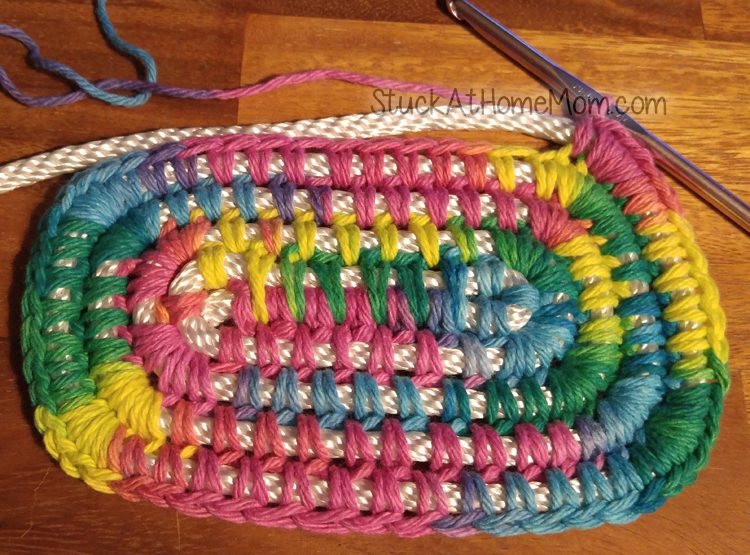
11 SC in the next 11 spaces
Cornering
4 SC in same space, 6 SC in next 6 spaces, 4 SC in same space
End Cornering
13 SC in the next 13 spaces
Cornering
4 SC in same space, 7 SC in next 7 spaces, 4 SC in same space
End Cornering
14 SC in next 14 spaces
Cornering
4 SC in same space, 9 SC in next 9 spaces, 4 SC in same space
End Cornering
16 SC in next 16 spaces
Cornering
4 SC in same space, 9 SC in next 9 spaces, 4 SC in same space
End Cornering
17 SC
Cornering
4 SC in same space, 12 SC in next 12 spaces, 4 SC in same space
End Cornering
19 SC
Cornering
4 SC in same space, 12 SC in next 12 spaces, 4 SC in same space
End Cornering
(Note: now that you have the idea, you can make the base as large as you want expanding on the steps above)
GOING UP
Flip the base over.
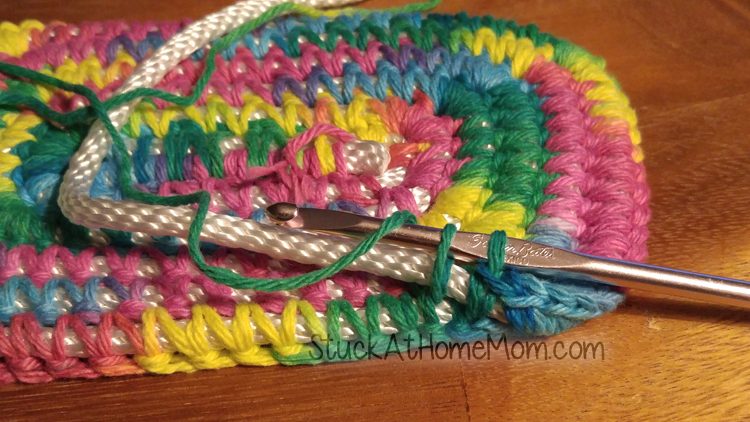
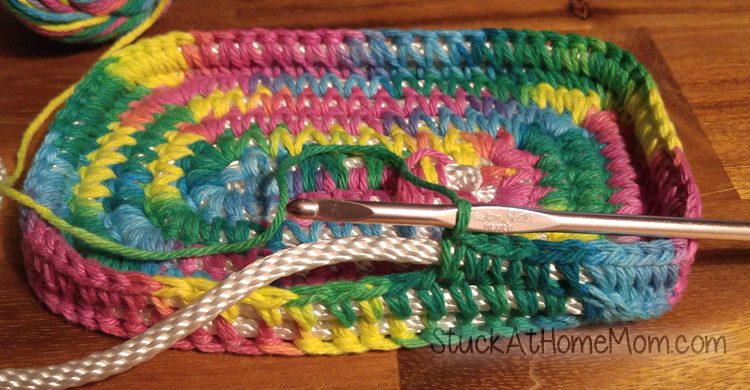
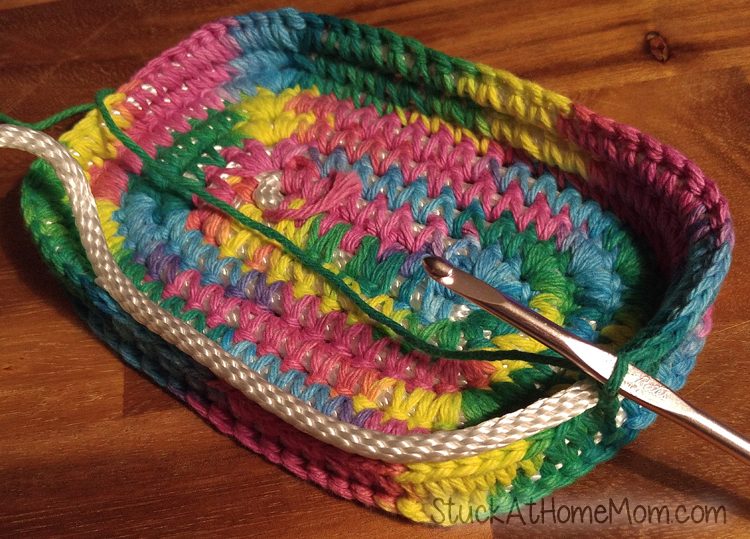
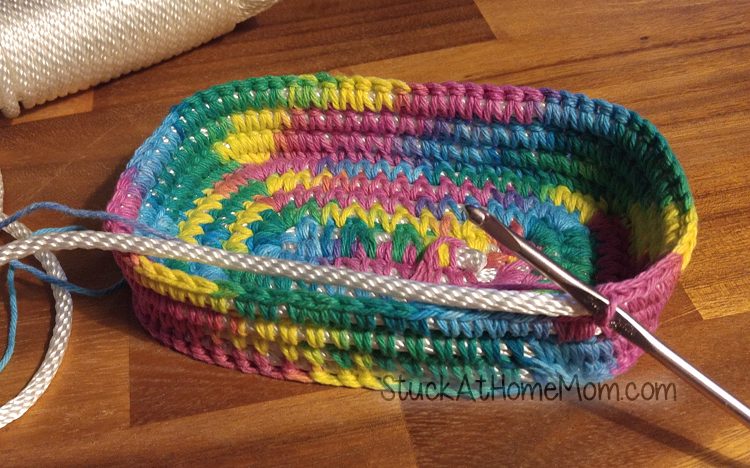
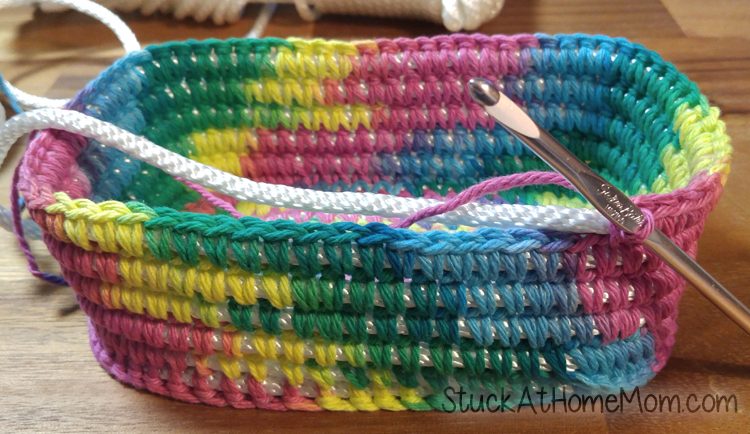
Placing the rope on the outer edge on top of the last row. SC going under the SC below the top rope, yarn over the top rope, pull through and complete the single crochet. See the example images below.
Repeat around the entire base. (No more counting, no more 4 SC, just 1 SC in same space)
Next rows:
After you have gone completely around the base as described above, you will continue to work up by SC between SC’s around and around until the desired high.
The basket walls flare out a bit as you work your way up. If you are making a large basket you will want the walls to go straight up. See Alternative Walls at the bottom of this article below the images for those directions. BEFORE you see Alternative Walls, learn how to ‘Go Up’ using the images below or the directions will not make any sense.
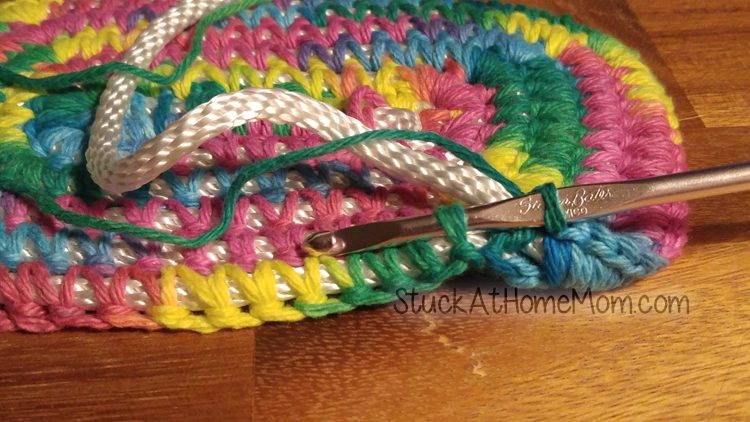
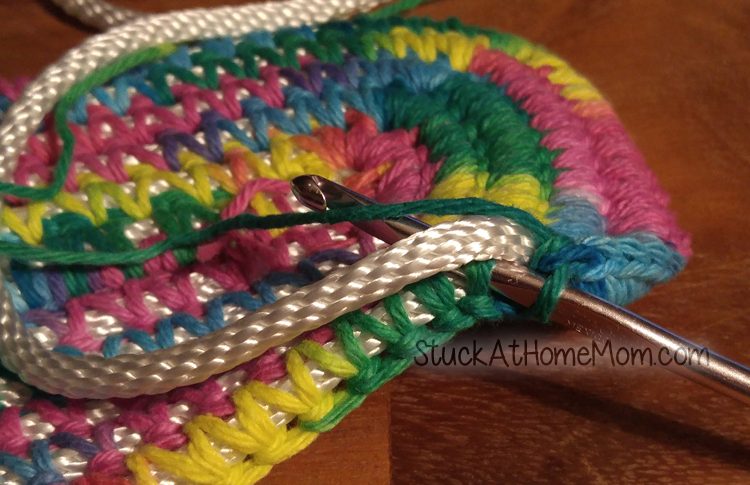
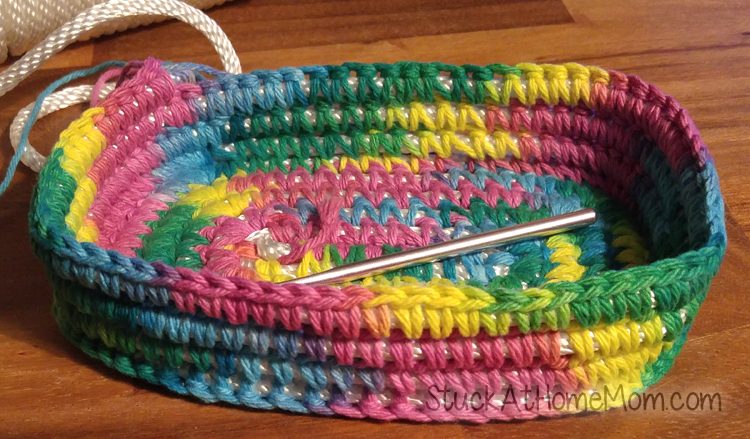
Keep circling the basket until you get to the desired height. The basket is designed to flare out a bit as you move up.
Handles:
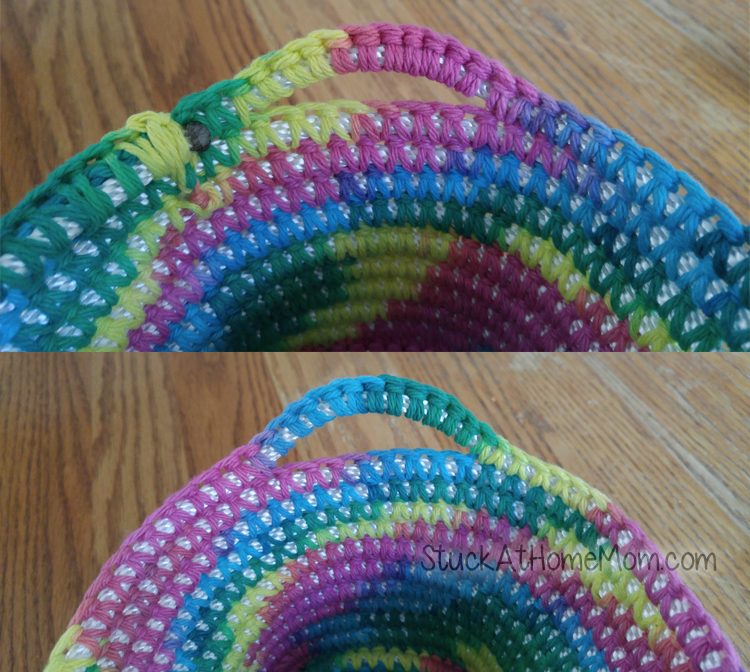
I admit, I wing the handles. As you can see in the image the handles are around the same size, but not exactly. If you want handles – pick the handle style you like best and use the image as a guide.
Finishing off:
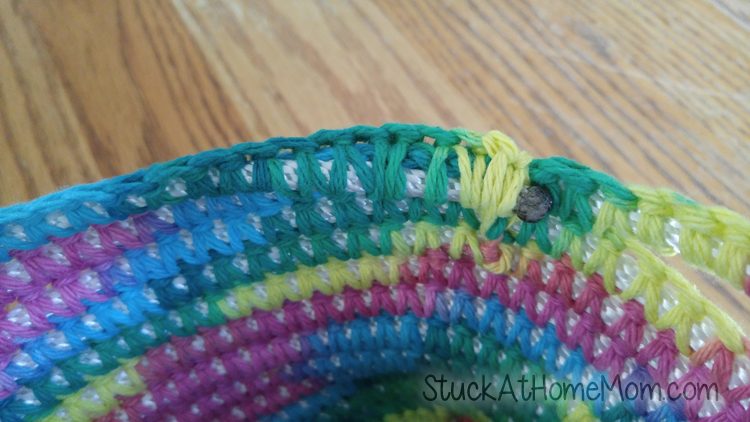
I start finishing off about 3 inches from the handle, so when you get about 6 inches from where you want to end, cut the rope and BURN the end of the rope. Be very careful not to burn the basket, yarn, fingers or your house down.
Once you get about 3 inches from the end begin to SC around both the front rope and the back rope from the last row at the same time. Continue doing this until you come to the end of the rope the fasten off.
Alternative Walls
To make the walls go straight up, using the ‘Going Up’ directions above, at the 4 SC corners you will need to reduce SC with the middle 2 SC with the 4 SC.
In other words, when you start to build the walls (going up), within the 4 SC you will do 1 SC as described above. Then you will take the next 2 SC together reducing them into 1 SC, then SC in the last SC as described above when going up.
The best way to learn this is to first learn the way to ‘go up’ the basic way, looking at the images, then come back and reread these directions.
